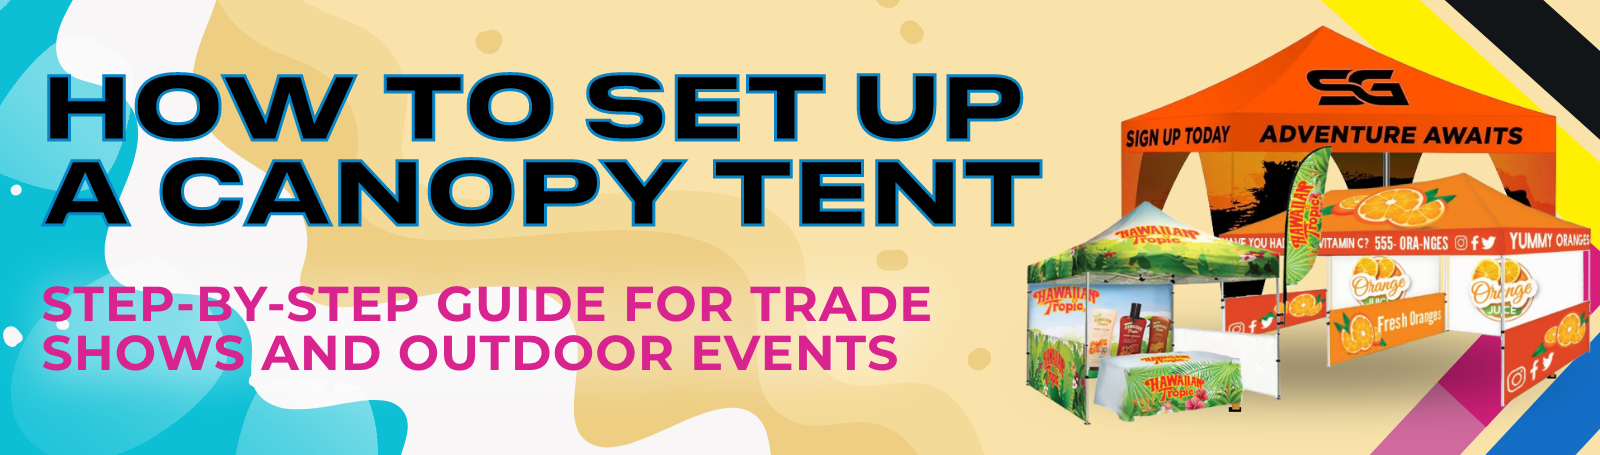
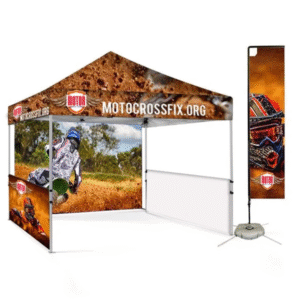
Custom canopy tents are a must-have for trade shows and outdoor events. They are a great way to draw attention and look professional at any event. Regardless of what type of experience you’re after, a canopy tent creates a branded space that keeps you protected from the elements. Wondering how to set up a canopy tent?
At Lush Banners, we offer high-quality custom-printed canopy tents that are easy to assemble. This guide walks you through the easy canopy tent installation setup process so you can get up and running quickly—no stress, no hassle.
Table of Contents
ToggleCanopy Tent Setup Guide: What You Need Before You Begin
Q: Can I Set Up a Canopy Tent By Myself?
Yes! While it’s faster with two people, you can set up a pop up canopy tent on your own. Most setups take just 5–10 minutes with a partner, depending on the accessories used.
Q: What Comes in a Lush Banners Custom Pop Up Canopy Tent Kit?
Be sure to lay everything out before starting—this ensures a smooth, efficient outdoor event tent setup. Here’s what is included when you order a custom event tent from us.
- Folding commercial-grade tent frame
- Custom-printed canopy top
- Free carrying case
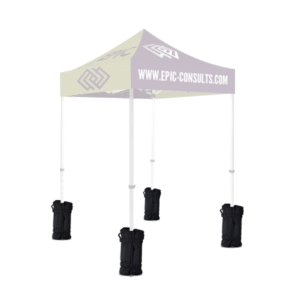
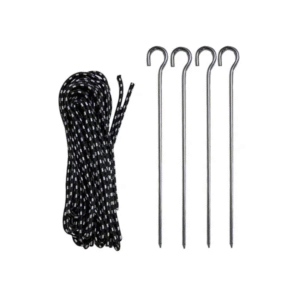
- Stakes or weight bags
- Optional add-ons:
- Full or half back walls
- Side walls
- Custom table covers
- Flag attachments
Step-by-Step Canopy Tent Setup Instructions
Ready to set up your canopy tent? We suggest watching the quick video at the top of this blog with some important tent assembly tips before you get started.
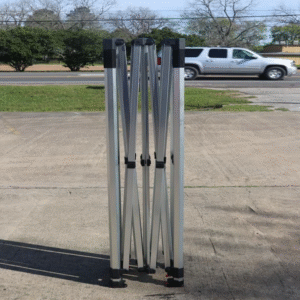
Step 1 – Unpack the Frame:
Remove the folding canopy frame from the carrying case and place it upright on the ground. Make sure you have plenty of open space to work with.
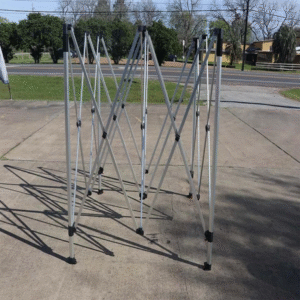
Step 2 – Partially Expand the Frame:
With a firm grip on two legs, gently pull the frame outward until it’s about halfway expanded.
Step 3 – Add the Customized Tent Canopy Top to Your Pop Up Tent:
Place the custom printed canopy over the frame before fully expanding it. Secure the corners with Velcro straps or clips, depending on the design.

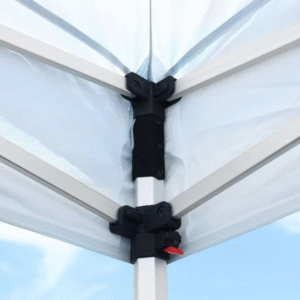
Step 4 – Fully extend the Frame:
Walk backward to extend the frame until it locks into place. Make sure all corner latches are secure.
Step 5 – Adjust the Height:
Use the adjustable push buttons on the legs to raise the tent to your preferred height setting. The great thing about our tents is that you can adjust not only the height of the legs, but also the top of the canopy with a lever in the center. This gives you ultimate control of your display.

Step 6 – Secure the Tent:
Use stakes for grass or weight bags for pavement to anchor the tent. Add any side walls, flags, or accessories last.
Tips for a Safe, Sturdy Setup (and Mistakes to Avoid)
Whether you’re setting up at a busy trade show or an outdoor market, your custom printed canopy tents needs to be secure, functional, and presentable. Below are expert tips to help you get the most out of your tent, plus common mistakes to avoid so you can protect your investment.
Anchor Everything—Always!
Skipping the weights or stakes is one of the biggest mistakes you can make. Even light wind can lift an unsecured tent, causing it to flip, collapse, or crash into nearby booths, vehicles, or people. To properly secure a canopy tent in wind, always anchor your tent before walking away.
- For grass or soft ground, use metal stakes and ropes.
- For concrete or pavement, go with weight bags, sandbags, or water barrels.
- Use both methods for extra security in windy areas.
Pro Tip: Lush Banners includes a free setup kit with every purchase, which contains stakes, ropes, and a carrying case to help you get started right. Check out our list of additional tent accessories and hardware here.
Don’t Force the Frame
It’s tempting to push or pull the frame into place, especially if you’re in a hurry. But forcing the frame without unlocking all latches or extending the legs properly can permanently bend or break the structure. If something feels stuck, stop and inspect the locking mechanisms.
Pack Properly After Your Event
After your event, make sure the canopy top is completely dry before folding and storing it. Storing a wet canopy can lead to mildew, mold, and fabric damage, shortening the lifespan of your investment.
To extend the life of your tent, consider upgrading to:
- Heavy-Duty Carrying Bag with Wheels: Perfect for vendors on the move.
- Stackable Hard Case for Air Freight: Ideal for protecting your tent during travel and shipping.
Disassemble Carefully
Taking down your tent is just as important as setting it up. Always remove weights or stakes last. We see all too often people remove stakes and weights first and their tent frame and canopy blow away and get run over by cars or damaged by the wind. Be extra careful to disassemble from top to bottom.
Double-Check All Frame Locks
Before finalizing your setup, check that all corner and leg locks have clicked into place. A single unlocked joint can lead to a collapse, especially if people lean on your table or if the wind picks up unexpectedly.

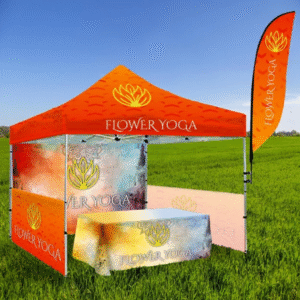
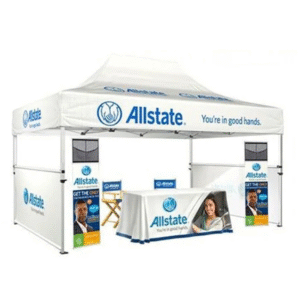
Add Branding Accessories for a Professional Finish
Once your tent is safe and secure, take it to the next level with eye-catching accessories. These not only enhance your brand’s visibility but also make your booth more functional and inviting.
Recommended accessories:
Need more options? Browse our full canopy tent accessories collection for everything from flag attachments to display add-ons.
Most Popular Custom Canopy Tent Options For Events and Tradeshows
1. 10x10ft Custom Pop Up Tent
- Most popular size for trade shows and markets
- Full-color custom print included
- Fast setup with a heavy-duty aluminum frame
2. 10x15ft Custom Trade Show Canopy Tent
- Spacious size, great for events with a lot of people
- Versatile customization options for the top
- Adjustable height for maximum convenience
3. Deluxe 10x20ft Canopy Tent
- Lifetime warranty on frames
- Easy pop-up design with a quick lock and release system
- Endless options like LED lights, side rails, gutters, and weights

4. 8x8ft Custom Canopy
- Fully customizable top with optional back and sides
- Canopy graphics are printed on heavy-duty premium Oxford cloth
- High-definition edge-to-edge printing with UV-resistant inks
Want More Products? Check Out Some Of Lush Banners Popular Outdoor and Event Displays and Accessories
Why Choose Lush Banners Canopy Tents
- Our canopy tents are made with durable, commercial-grade frames that are built to last through event after event.
- Lush Banners canopy tent setup is easy, which means you can assemble your tent in just minutes with only one or two people.
- Each tent features custom-printed graphics created with vibrant, UV-resistant inks for long-lasting color and visibility.
- Every purchase includes a free carrying case and essential add-ons to make setup and transport even easier.
- We offer exceptional customer support to guide you through the setup process and answer any maintenance questions you may have.
Ready To Shop For Your Next Trade Show Display Tents
Setting up your canopy tent doesn’t have to be stressful. With a bit of preparation and a quality tent from Lush Banners, you’ll be ready to make a lasting impression in no time.
Browse our complete line of custom canopy tents and elevate your next event with professional-grade gear that’s built for visibility, performance, and ease.
Need help picking the right tent or accessories? Reach out to our friendly team—we’re happy to help!